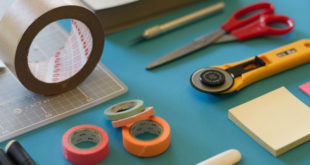
How nice would it be to make own unique paper with special design?
Essentials
- a mould and deckle
- a thick, clean kitchen sponge
- sheets of cotton or felt
- recycled paper scraps (or shavings)
- a blender
- dried herbs, flowers, or garden weeds
- a tub larger than your mould and deckle
- water
Directions
1. Fill your tub about halfway with lukewarm warm water and set it aside.
2. Fill a blender halfway (loosely, not packed) with recycled paper torn into smaller pieces. You can use the paper from your paper shredder bin, old newspapers or packing paper, etc. You’ll want to avoid papers with a glossy coating; matte papers will work best. Old coloring sheets, tissue paper, or construction paper could be added to the mix to incorporate a bit of color to the finished paper.
3. Add water to the blender until all of the paper is covered by about an inch or two of liquid. Pulse the blender for about 30 seconds, or until you’re left with a pulpy, watery mix, free of large chunks.
4. At this point, you can add a little bit of dried herb, flowers, or garden weeds to the blender and pulse again to incorporate. I like to use garden “weeds” in my paper – Plantain, Dandelion, etc. all work well once dried. You can also use dried Rose or Calendula petals, or just about anything else that you’d like to include.
5. Pour the pulp into your tub of water and use your hand or a spatula to give it a good mix. After agitating the water, lower your mould and deckle into the tub, below the surface of the water, holding both pieces of it tightly together so they don’t separate. Let the pulp settle a bit into the frame, then slowly lift the mould and deckle out of the water. Let the excess water drip through the screen back into the tub.
6. Remove the top piece of the frame and set it aside so that you are left with just the screened piece.
7. Lay a sheet of cotton batting or felt over the paper sheet, then lay a cookie sheet on top of that. Flip the entire ensemble over carefully (the cookie sheet helps to keep everything flat while flipping, sort of like flipping a cake out of a cake pan) and set the cookie sheet aside. The cotton sheet will now be touching the counter (or work surface); the new paper sheet will be on top of that and the screened frame will be on top.
8. Press the kitchen sponge along the screen to absorb excess water, squeezing the water out of the sponge and back into the tub as you go. Once you have removed much of the moisture from the paper through the screen, you can lift the screened frame off so you’re
left with your new sheet of paper laying on the sheet of cotton batting.
9. At this point, you can leave the sheet as is in a safe place to dry. After a few hours, you can remove the paper from the cotton batting and let it continue to dry out. Once all of the water has evaporated, you’ll be left with a beautiful sheet of handmade paper!
Source bfc.green Promoting Green Lifestyle


