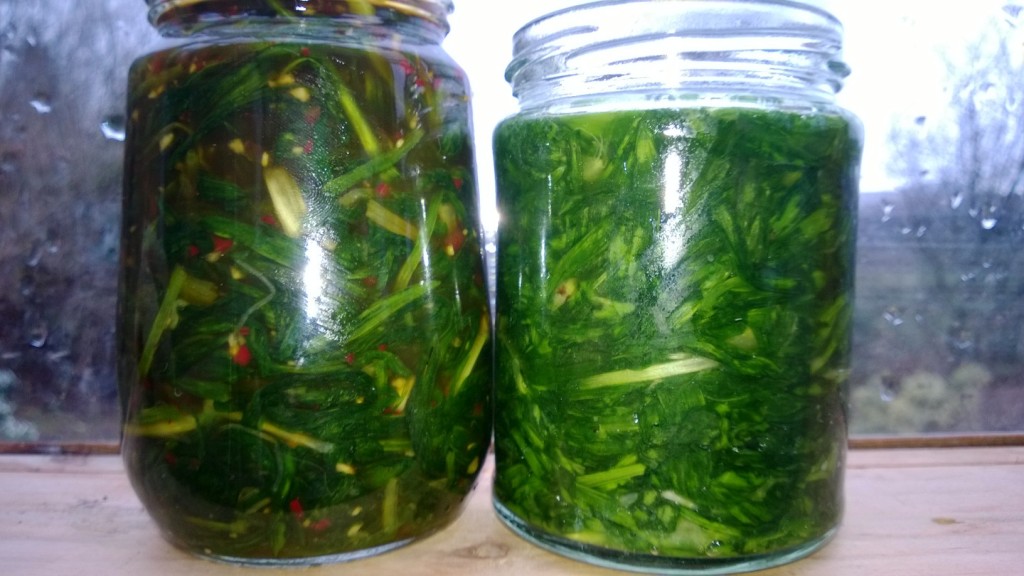
Here is a simple preparation that turns some already tasty wild foods into something truly delicious that keeps really well.

You may start with something you can gather quickly and easily in decent quantities. Wild garlic or other edible alliums like few-flower or three-corner leek are excellent candidates. They are easy to come by and, while tasty enough fresh, have quite a one-dimensional flavour that becomes much more complex when fermented. You could also try cow parsley, nettle, ground elder, sea beet, sea aster, wild cabbage, sea radish, garlic mustard, common hogweed or any green, leafy wild plant. If gathering plants with a lot of stalk, like cow parsley, you can include all but the toughest stems.
The plants you use should be squeaky-fresh. Wash in settled water and spin-dry – you don’t want the plant dripping in tap water – it contains chlorine and additives that inhibit fermentation. Place the shredded plants in a large open bowl, a few handfuls at a time. Sprinkle each layer lightly with natural sea salt. Leave to stand for 20 to 60 minutes. This allows the salt to start its work drawing the juices from the leaves. Massage the salted, shredded leaves with your hands until they darken, become wet and start to lose their form. Leave to stand for another 20 to 60 minutes. Weighing the leaves down with a plate can help get the juices flowing here – but its not essential.
Pack the leaves firmly into a glass jar. Ensure the vessel is clean. As you add the leaves to the vessel, champ them firmly down with the spoon – it is important to avoid air pockets between the wet leaves. By the time you have three quarter filled the vessel with champed down plant, you should be aware of plenty of juice. There should be enough liquid to cover the leaves. If you are packing into multiple vessels, ensure you add the liquid left in the bowl evenly to top up each vessel to about three quarters full. If you cant get the juice to cover the leaves, add some natural, uncarbonated, mineral water – do not be tempted to add tap water, as the additives inhibit fermentation.
Fermentation must take place in an anaerobic environment – ie. with no air present. So find a way to keep the leaves weighed down beneath the level of the liquid in the vessel. Traditional fermenting crocks have specially designed lids for this very purpose. But a standard jam jar or large yogurt pot is just the right size to sit inside kilner jars, and tiny yogurt pots or jars are often the right size to fit inside standard jam jars. So play around and see what you come up with. Typically, a jam jar filled with water should be enough to keep your fermenting leaves submerged.
Resist all temptation to put the ferment in the fridge. The helpful bacteria that will preserve and give character are dormant at low temperatures. Do not be alarmed by white froth/bubbles forming – this is a normal part of the fermentation process. You can scrape the froth off if it disturbs you! Blue mould, blackening or a “cheesy” smell are not good signs!
Leave it to ferment at ambient temperatures for at least a week, but as long as you wish. You can dip in and taste on a regular basis until you are happy with the flavour. After a week you should notice the characteristic slightly “fizzy” mouth-feel of all lacto-fermented greens. The greens should retain a surprising crunchiness for something that looks so wet and wilted. The sharp, pungent flavours (of wild garlic for example) should have mellowed into a rounder, more complex flavour. When you are happy with the flavour, remove the weighing-down item, put on the lid and keep in the fridge. If you have fermented in a large vessel, its best to re-jar the ferment in smaller jars for storage – this keeps air exposure to a minimum, especially if you ensure there is a covering of liquid. The ferment should keep well for several months in sealed jars, but consume them within a couple of weeks once you start using the jar.
Read more here
 bfc.green Promoting Green Lifestyle


