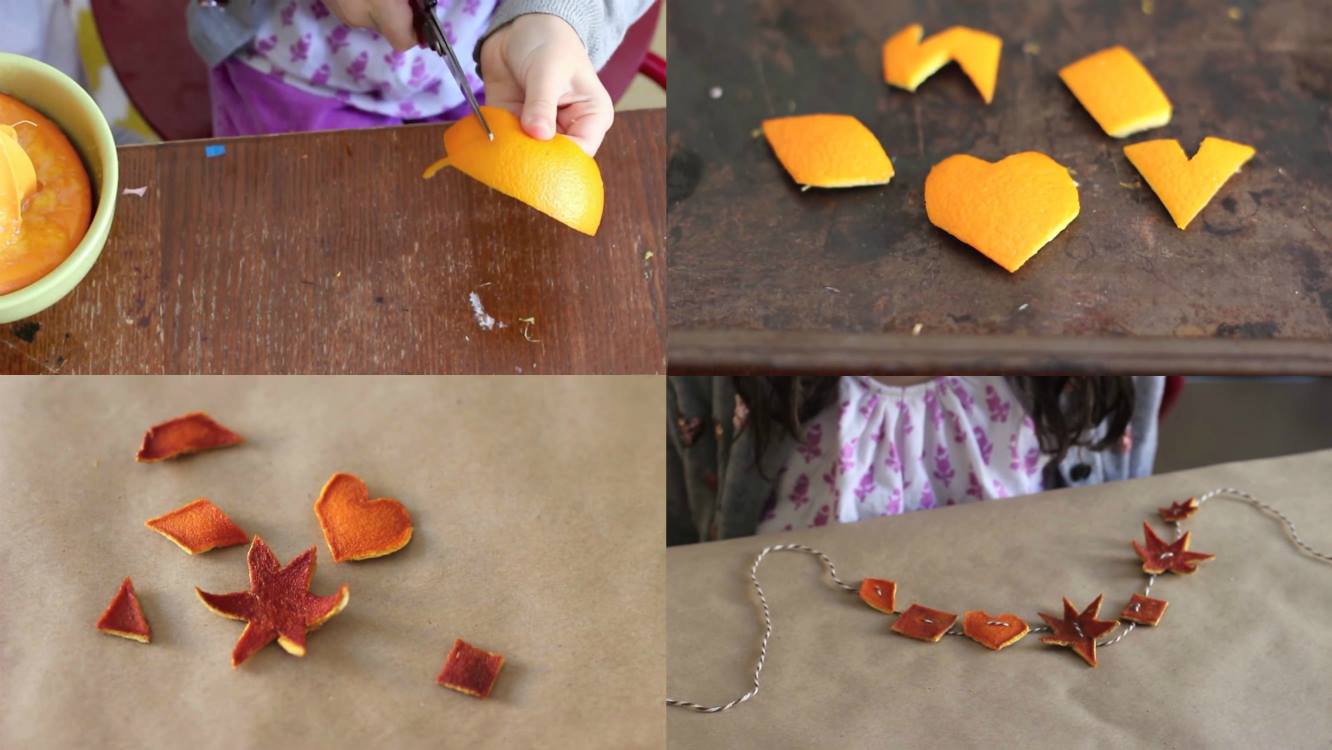
Citrus Peel Garland
Cut peels into geometric shapes and string them into a decorative garland when they’re dry!
You will need: oranges, a knife to cut the oranges in half (adults only), scissors, baker’s twine, a baking/cookie sheet, hand juicer, spoon.
- Scrape the orange peels clean with a spoon.
- Flatten the orange peels out a bit then cut them into small geometric shapes. You can do hearts, triangles, diamonds, rectangles, squares and stars.
- Place the orange peels that cut into shapes on a cookie sheet. Bake the peels in the oven at 90°C for about 1½ to 2 hours or until dry.
- Once dry, lay the peels on a flat surface and poke two holes into each shape with a thumbtack (adults only).
- String baker’s twine through the holes of each shape and form a beautiful garland!
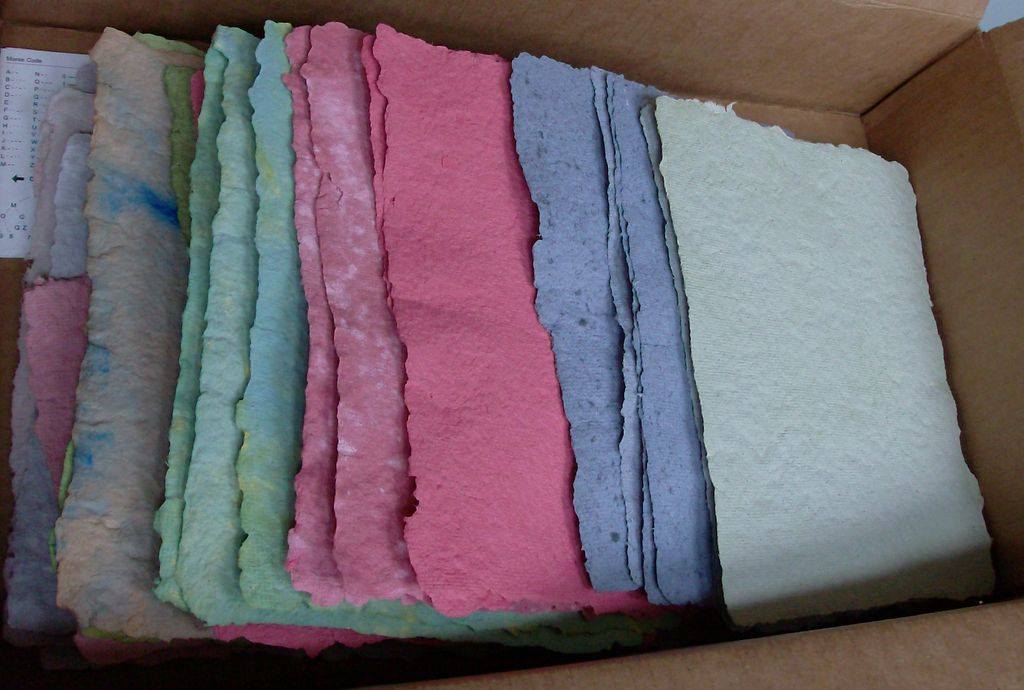
Homemade Paper
Handmade paper for even more creative postcards! Take an old picture frame and staple a screen to it tightly. Look through your recycling bin or around the house for any paper you can reuse. Collect vegetable or fruit scraps and plant materials. Tear papers into small pieces and soak in a tub or bowl of water for a few hours or overnight. Fill a blender three-quarters full with water. Add a handful of wet paper into the blender. Blend paper until there are no large pieces left. Fill a shallow basin such as a plastic container or a cookie sheet with water and the pulp. Stir the mixture and add decorations – plant fibers, food coloring or paint, etc. Dip the frame into the mixture and swish the frame around to get an even amount of pulp on the screen. Set the frame on the edge of the basin to let the paper drip-dry. After a few minutes use a towel or sponge to blot away as much liquid as possible. Place the paper face down on a towel or felt. Let the paper dry completely. Gently lift the screen. That’s all!
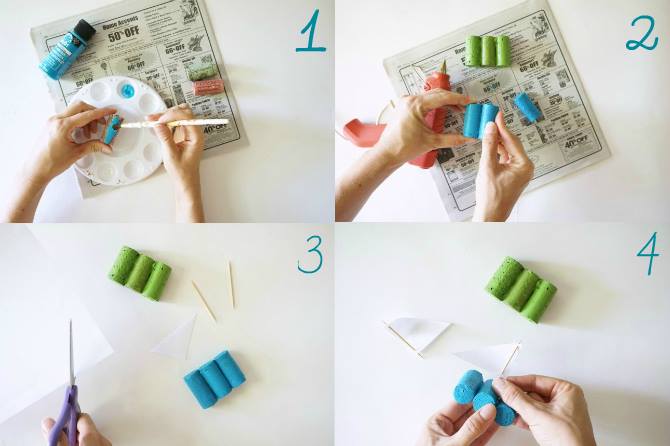
Recycled Cork Boats
With just a few simple supplies, little hands can keep busy while going green. Come sail the seven seas in your own backyard with these fun recycled cork boats! You will need: 3 corks for each boat, acrylic paint and paintbrush, hot glue gun,
scrap paper, scissors and toothpick.
- Paint your corks and let them dry
- Glue three corks together with the glue gun
- Cut the corner of a scrap piece of paper to make a triangle for your sail
- Slide toothpick through the sail and push the toothpick into the center cork
- Add some water and set sail!
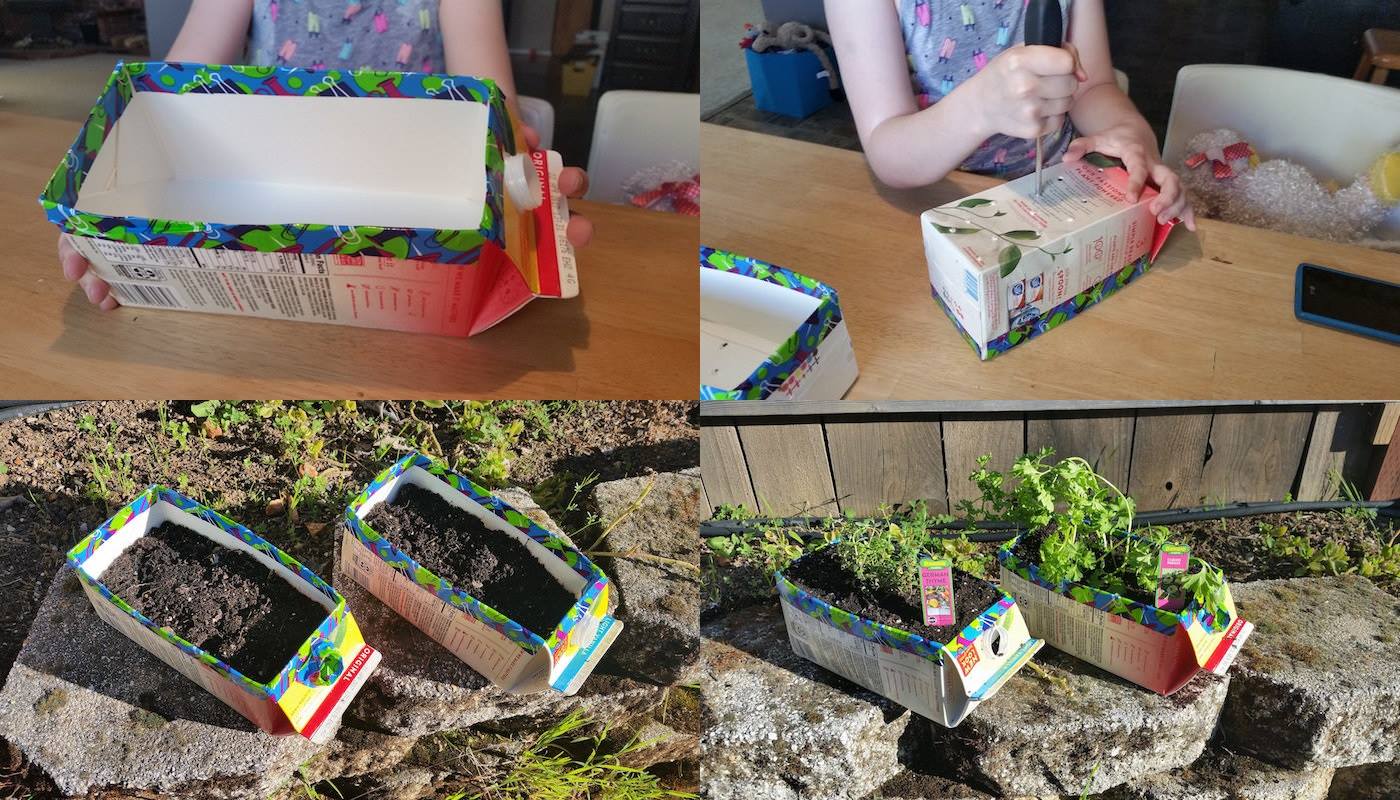
Milk Carton Garden
Milk carton gardens are a fun way to create a kid-friendly container garden and recycle at the same time!
What you’ll need: milk cartons, decorative duct tape, scissors, screwdriver, potting soil and herbs.
- Cut one side of the carton out for an opening (this is a job for grown-ups or older kids).
- Then add patterned duct tape along the cut edges. This will add some flare to your planter as well as prevent paper cuts.
- Next, using your screwdriver, punch a few holes in the bottom of the containers for drainage.
- Plop in your herbs. All you have to do now is water your herbs and enjoy!
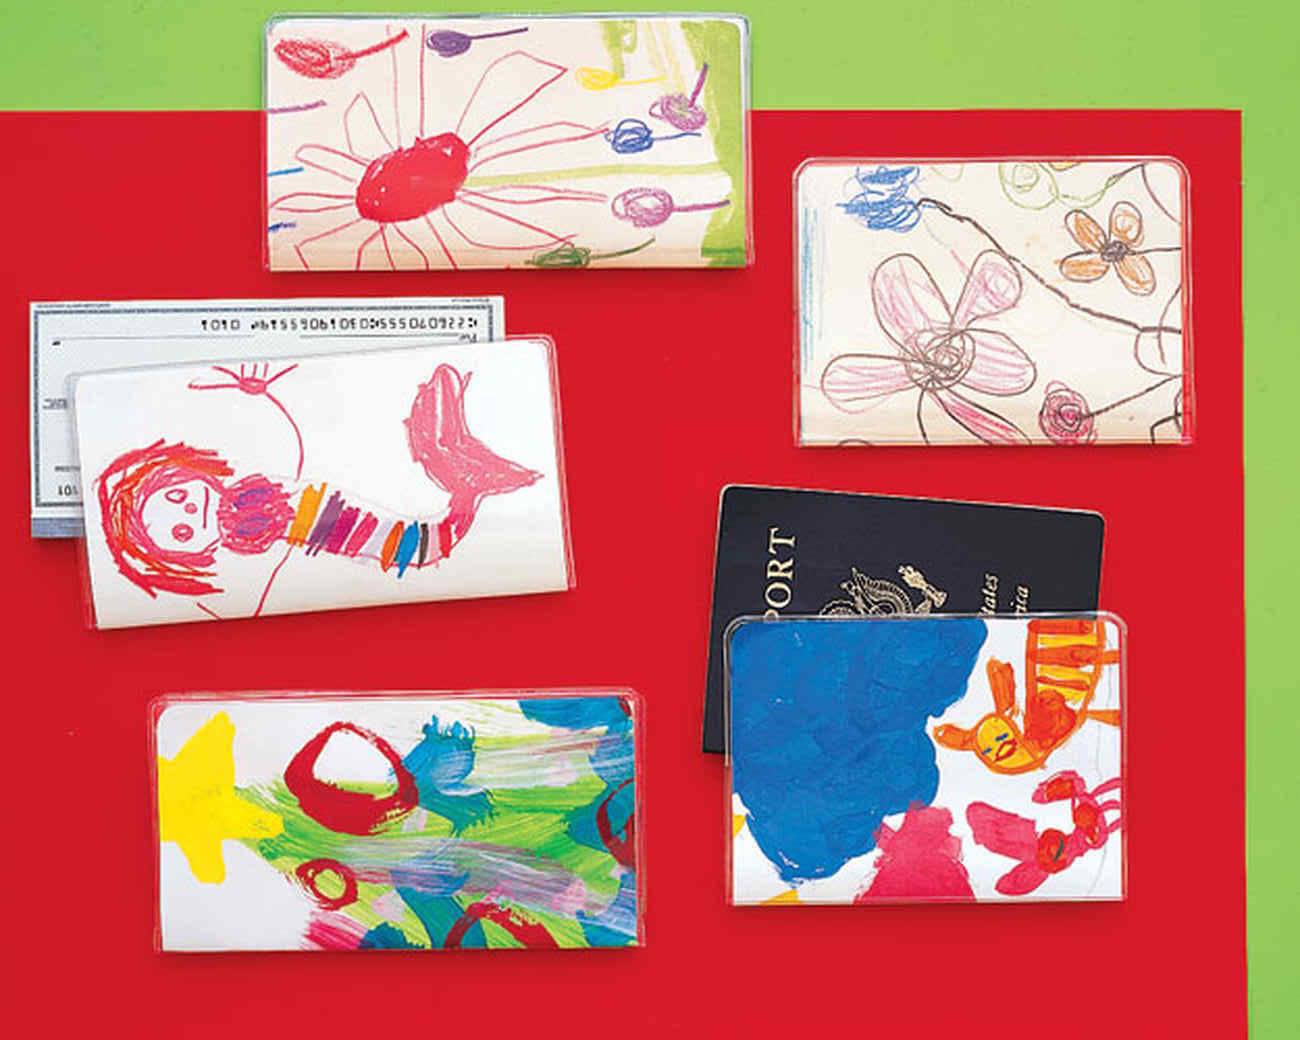
Passport cover
These practical yet playful covers make even the most mundane tasks more pleasant. Using a clear passport cover as a template, trace over child’s artwork. Slip picture inside sleeve.
Every member of the family will be proud to have a unique passport cover. Grandparents will be happy to get it as a gift from the nephew/niece to keep his/hers piece of art always nearby.

Piggy bank
Recycle old water bottles and save money. Not only does this craft encourage saving money, but it also shows how to recycle by using old water bottles! What you’ll need: scissors, colored and patterned paper, water bottles, white craft glue, utility knife, black marker, wooden beads and ruler.
- Using a colored paper of your choice, cut a long wide strip to wrap around the bottle. Use glue to hold paper in place on the bottle.
- Draw the inner and out piggy ear shapes with the paper of your choice. Once you have cut out the different ear shapes, glue the inner ear shape to the outer ear shape.
- Then bend back the bottom part of the ear and glue it to the upper side of the bottle.
- Cut a circle out of pink paper that is the circumference of the bottle cap and glue it onto the bottle top to create the pig’s snout.
- Use black marker to create eyes and nostrils.
- Use wooden beads as the feet by gluing them to the bottom of the bank.
- Cut a slit on the top of the bottle for coins using your utility knife or box cutter (strict parental supervision is required during this step).
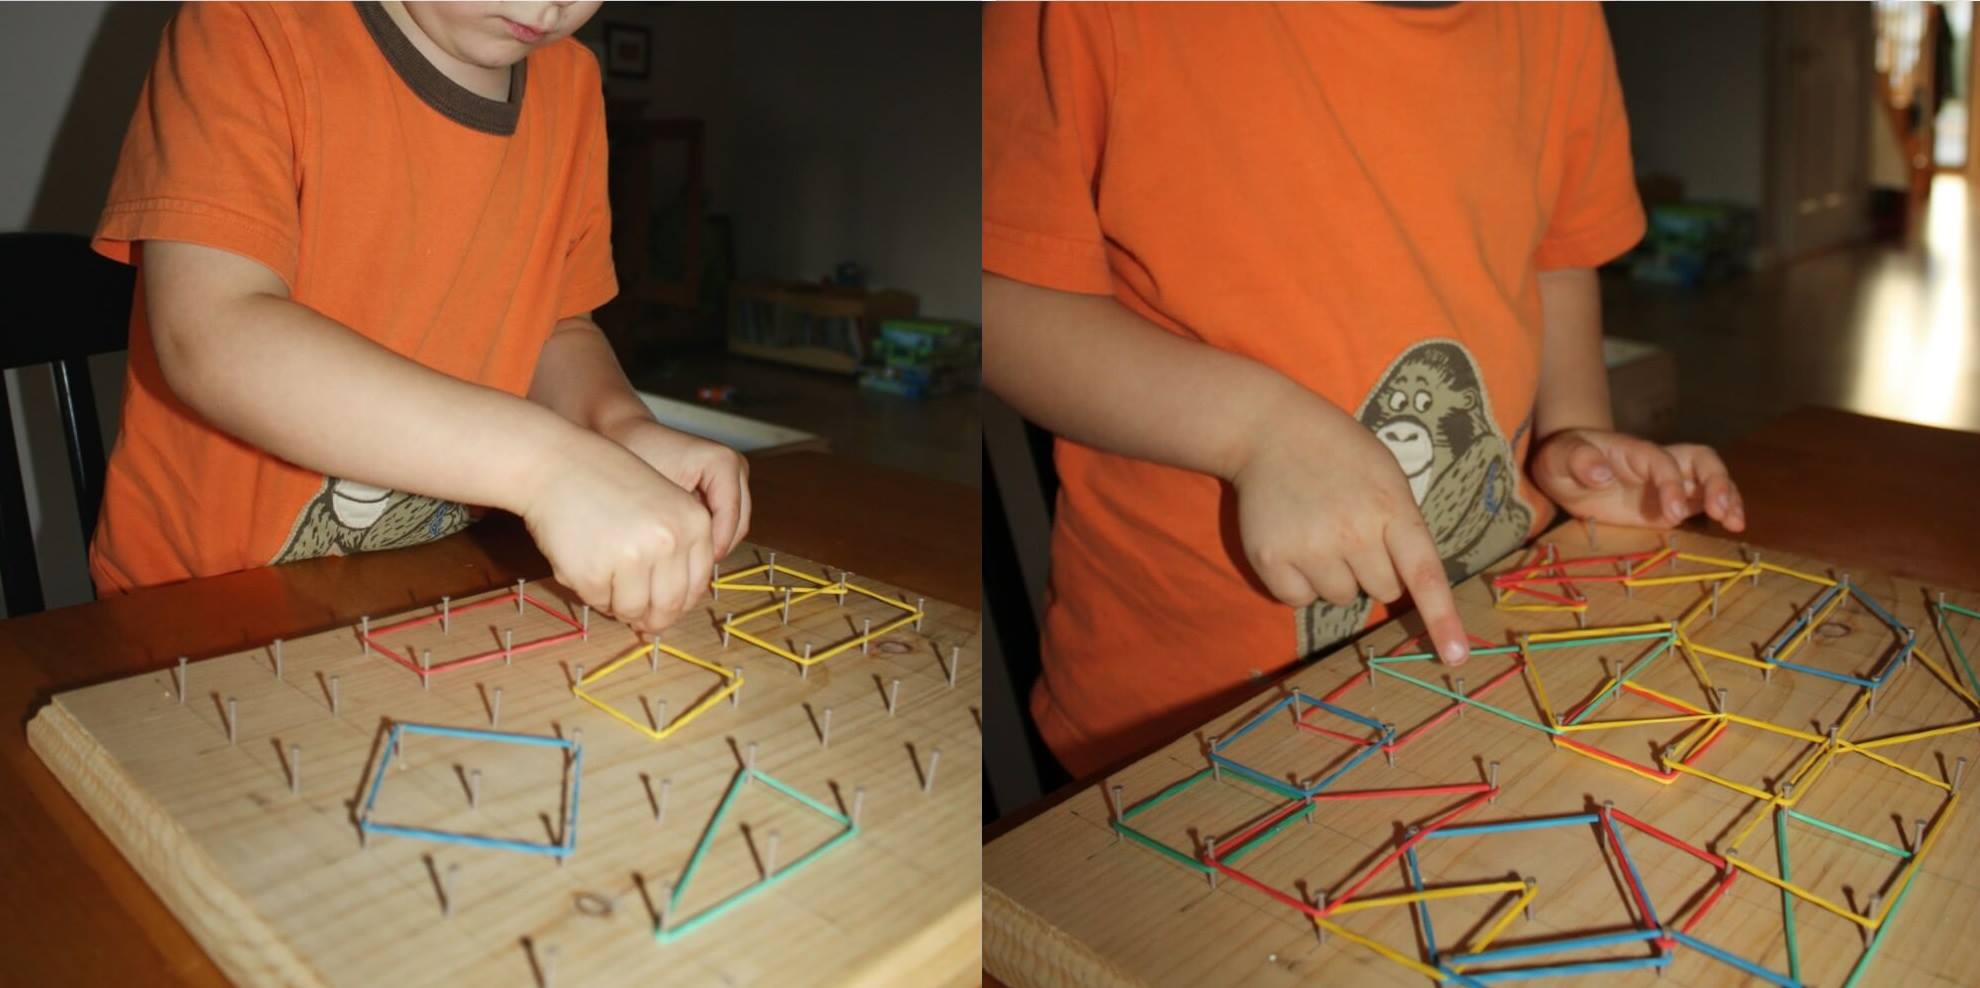
Geoboards
Have a child who needs to learn letters or shapes? Make them a geoboard! You can make this as fancy as you want to, but first start off with a rectangle of scrap wood. If you don’t feel like measuring out where each peg will go, you can put a piece of graph paper over the wood. Decide how close you want the pegs to be. Your pegs can be push pins or small nails and you’ll hammer these in according to the pattern you have determined. Give these with a package of rubber bands for immediate play!